We talk a lot through voice means, even if there are more and better ways to talk through free applications with high quality, or even applications that provide us with a better video chatting service, written conversations will continue to lead in the field of conversation, there may be many reasons for this. Users who prefer writing over conversation because of the speed of arrival and reception of messages, unlike audio or video that often suffer from disruption, especially in developing countries with low Internet speeds, and there are those who prefer written conversations due to their ability to keep everything that is said in the event of a desire to return to it, but hey If this is the reason why text chats are preferred over voice and video chats, what do you think would happen if we accidentally delete chats and all the data shared through that chat, information or reminders are lost? Herein lies the topic of our article today.
In this series, I will try to explain how to recover deleted messages through a group of the most popular text messaging services, and I will start in this article with the WhatsApp application owned by Facebook.
It is not that difficult, it just needs to follow the steps correctly and focus on each word, so follow the following lines, dear reader.
Take a backup
Before we start how to restore backups if they exist or how to recover deleted messages at all, let’s first explain how to take a backup of the application.
You can keep a backup copy of the application on any of your phone’s memory or on your account on the Google Drive cloud storage site.
To store the backup, whether on Google Drive or the internal memory, you must follow the same steps:
First open your WhatsApp app
Click on Settings, then Chats, and then Chat Backup
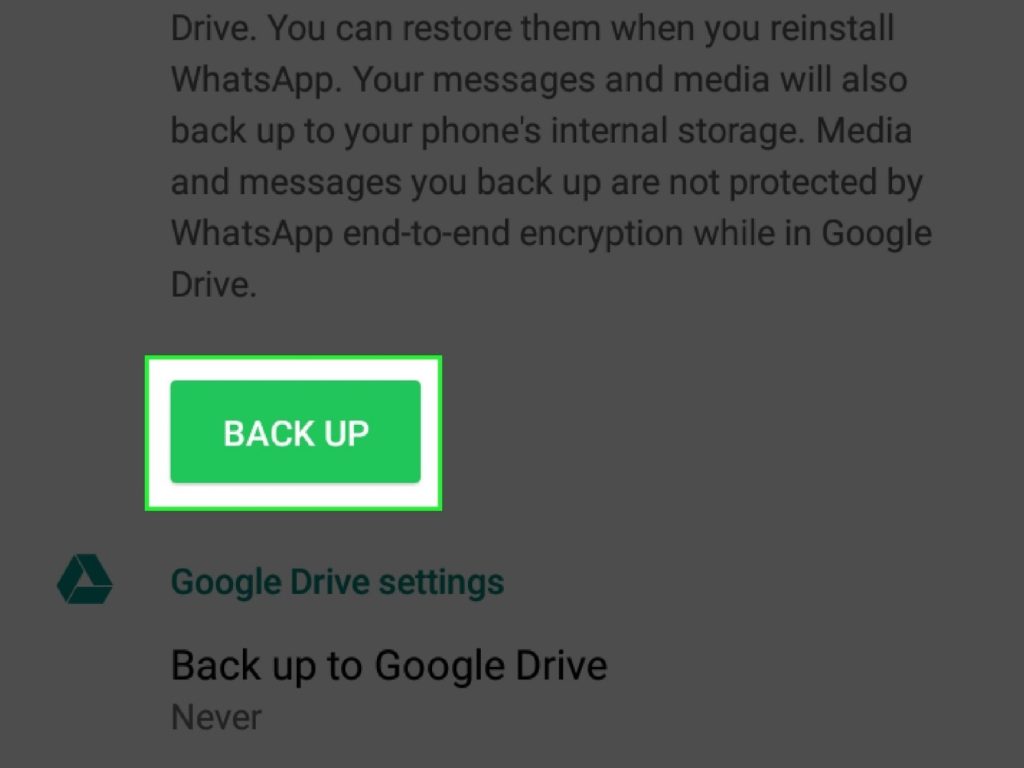
At this point, press the Back Up button if you want to keep the backup on your phone, or the Back Up to Google Drive button if you want to keep it on Google Drive.
WhatsApp messages recovery
You can choose the type of connection you want the Back Up to be done by pressing Back Up Over, and be careful, these backups are usually too big for a phone call, which can kill your data connection.
With this, you have kept the backup on Google Drive, we will start from the following lines on ways to restore messages, and the first is definitely the way we rely on you doing the previous steps in advance before reading this article.
Restore saved backups
The application allows you to restore saved backups, as it allowed you to save them at the beginning, and even allows you to transfer them between phones as well, by following the following steps.
Initially, you need to have a file management application, you can download any File Management application via the Google Play Store, and it is ES File Explorer File Manager, which I personally prefer.
After you download the application, open it and go to this path:
sdcard/WhatsApp/Databases
You may not find it in the internal memory, so search for it in the external memory and vice versa.
You may find more than one backup copy saved on the device, rename the file you want to restore from
msgstore-YYYY-MM-DD.1.db.crypt12
to me
msgstore.db.crypt12
That is, delete the date in the file name.
WhatsApp messages recovery
After modifying the file name, remove the WhasApp application via Application Manager, and re-install it again, and upon installation for the second time, the application will give you an option to restore the saved backup that you have changed its name.
Note: The backup that has been saved will be available for restoration within seven days only, so try to restore it before this period has passed.
With this, you have been able to complete the process of restoring the backup copy that was previously saved by you. We now move on to ways to restore messages in case you have not kept a backup copy of them.
Recover Messages with Android Data Recovery
Android Data Recovery is an application used on PC with Windows and MAC systems that enables you to recover your phone’s messages, photos, videos, WhatsApp conversations, and others through several steps. It supports almost all types of Android phones.
After downloading the program from its official website, connect your phone to the computer via a USB cable.
After connecting, activate USB Debugging in your phone, by going to Settings and then entering About Phone, this is of course in case you are not enabled for development mode on your phone, when you enter About Phone, you may press several times on Build Number, it will tell you Then “You are under developer mode” then go back to the main settings, and you will find an option called Developer Options, go to it and activate USB Debugging.
After activating the USB Debugging mode, and the program performs a comprehensive scan of your phone and identifies it, then choose what you want to erase, for example “WhatsApp” and click Next.
When you click Next, this will require you to give the program permission to scan your phone, and you can give it this permission by agreeing to the pop-up window that will appear on your phone by clicking on any of Allow, Grant, or Authorize.